Showing posts with label New Techniques. Show all posts

Tuesday, July 12, 2011

Around The Block

first leg
second leg
message on the road
after the push
last leg

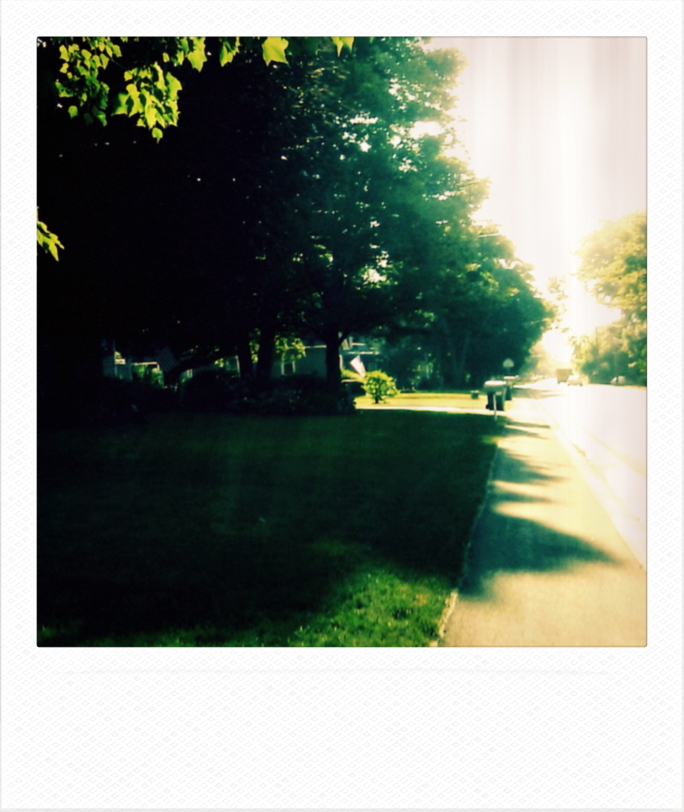
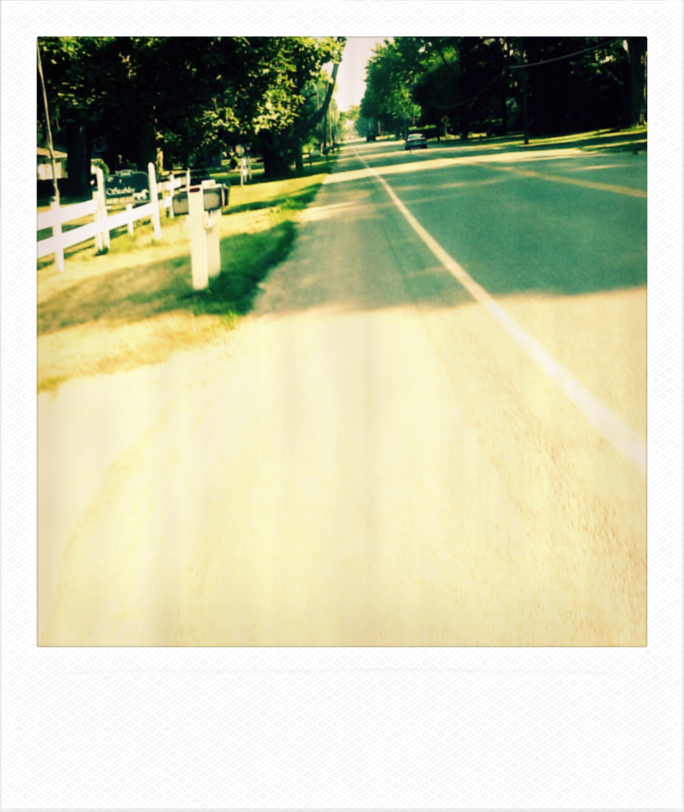
Oh how excited I am to share these images with you. As part of our first Superhero Photo assignment, I committed to bringing my camera along with me for the entire day. Now, I have always wanted to show you the path I run in the morning, but I have used the excuse that my Nikon is too heavy to run with as a way to get out of it. No more. Our fearless leader, Andrea Scher, says you can use any camera to take meaningful images. So with my phone in hand, with the camera app on, I set out on my run.

I snapped lots of photos along the way. Some that will never see the light of day, and that is okay. But these are a few. And I know what you are thinking... we are saying to yourself  "wow, Kerry, oh my goodness... your camera takes the most amazing images ever. Are you using a special app to make them look like old polaroids? Do you have an iPhone?"" To which I reply "Nope, no special app. No iPhone either. I did it all in photoshop!!"

I have been hearing whispers of something called "actions" for photoshop for sometime now. I even looked into it once before. But that first experience left me feeling like they were something for "professional" photographers/photoshop users. And I let my knowledge of them fall to the way side. I am constantly bombarded with the awesomeness that is Instagram images from friends with iPhones and I am incredibly jealous and even considered buying an iPhone just so I could take and post cool photos like them... but, first... I decided to give actions one last try.

It was a blistering hot day on Monday. Andrew started the summer session at his new school, Lauren was at a friend's house, Jacob had a few hours of weight lifting scheduled, and I found myself kid-free yet again (gawd I hope that becomes a reoccuring thing this summer!). So instead of trying to brave the inhuman temps I knew my studio would be reaching, I sat in my lovely air conditioned living room digging deeper into what these action thingies were/are and holy crow, they are a freaking piece of cake. They make editing life so much easier!! And I can make crappy camera phone shots look like super cool 1970s-esque polaroids in seconds. Yeah, literally seconds. Best part... all the actions I found to download are FREE.

Weird, I think I sound like a door to door salesman. HA!

Hmmm... I think I may have to work applying actions to images into my Snaptastic class for ArtBliss in September. And actually, one of my summer to-do list items is writing an e-book for that Snaptastic class and I am considering making it available to everyone as a download. Lots of new territory for me. Exciting isn't it.

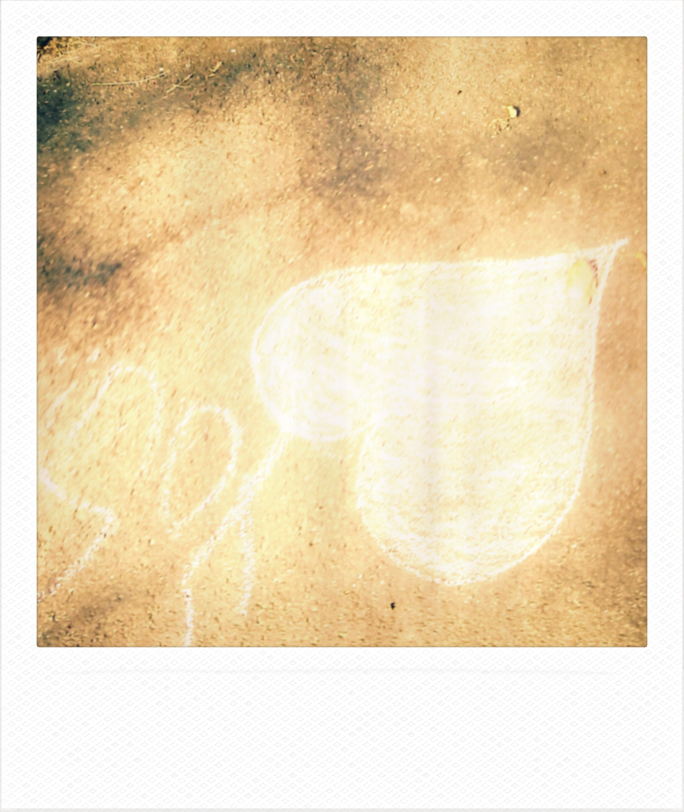
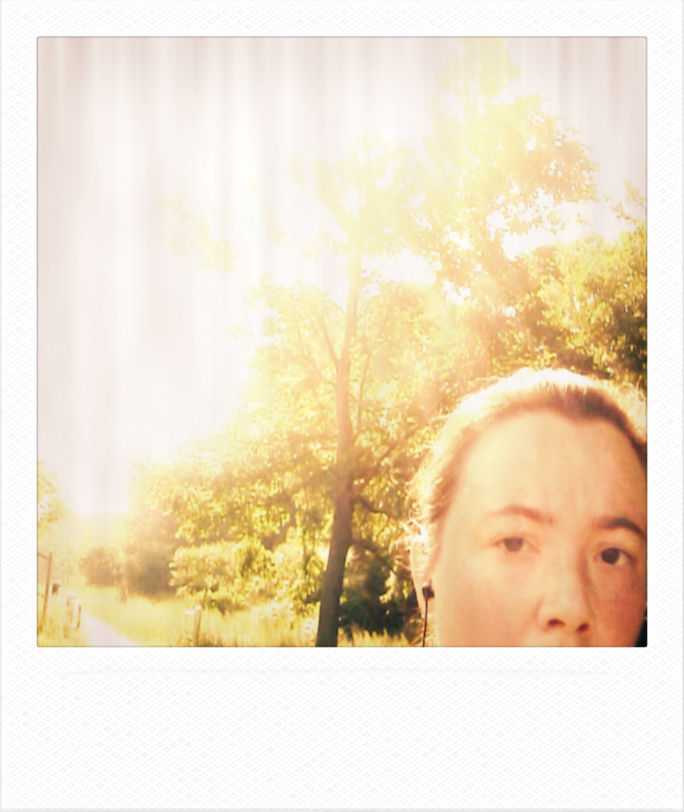
But, I digess... I was first saying how I always wanted to take you along for one of my morning runs. This is the path I run. It is 2.5 miles around my block. Or rather, halfway around my block. I cut down the bike trail to get back to my street. Otherwise, it would be a 5 mile run (which I have a goal of running in August). The L O V E Y O U message was on a bike trail leg of the run. I grinned so big when I saw it. It really spurred me on. I have friends that run marathons all the time, and I feel somewhat pathetic that I have to push through 2.5 miles. But, I am learning to be gentle with myself and know I will get there someday. It feels good to be out there, working on making me the best me I can be.

And one last polaroid... one of the shots from datenight last week. So wanna print this and hang it on the fridge.
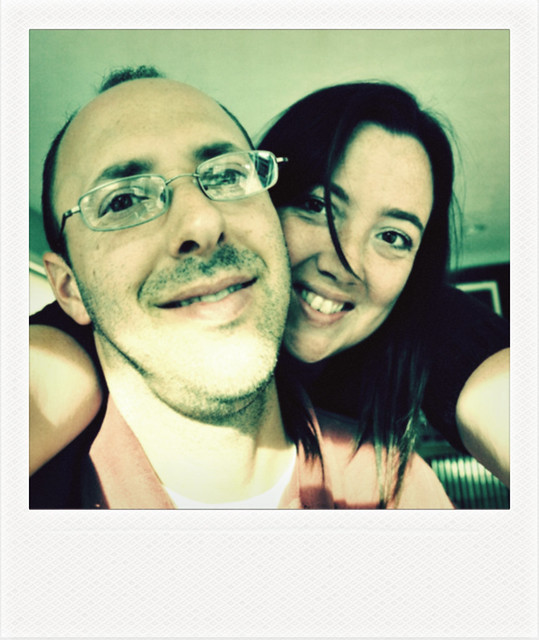
polaroid style 1

Wednesday, February 24, 2010

The Tumble From High Hopes Hill

I have had a completely blissed out few days. I have had music cranking... I have done tripods in a blue tutu... and I in the past 48 hours, doing what I love most, I have made absolute crap!

high hope adventure 1

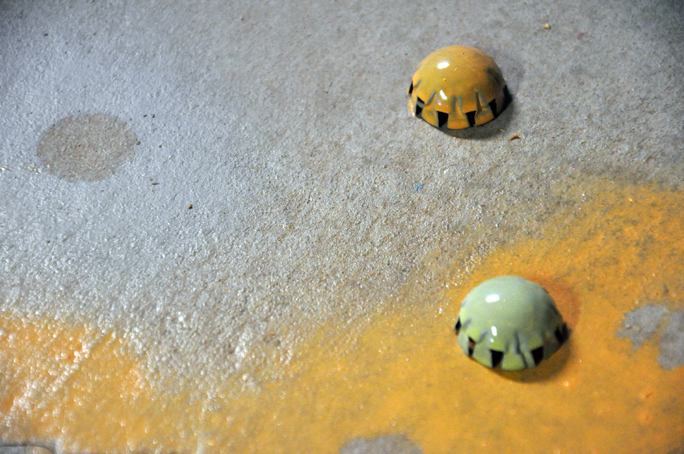
Here is what happened... I have a boat load of bottle caps at my disposal in my studio. I am talkin' hundreds. I have been wanting to find new way to work them into really cool jewelry designs. I have been pushing my creative thoughts to a place far outside the bottle cap box in pursuit of amazingly awesome possibilities. Suddenly it hit me... I could make them into bead caps... no wait, they need to be more then "caps" for the sides of beads, they need to be the bead. Wait, I have seen bottle caps made into beads before... how can I make them different? OH I KNOW! I will make them BIGGER, I will paint them... oh that would be cool.

high hope adventure 2

Now picture me in my studio on Monday with a bag of bottle caps, a bench block, a hammer, loud music, a dapping set, a blue tutu, metal cutters, and spray paint. Yeah, it was good times. I smashed and bashed and cupped and cut and dovetailed those bottle caps with all my heart. With each whack of the hammer I was getting a stronger foothold and climbing higher and higher up High Hopes Hill. I left my studio with bead parts all over the floor, covered in drying paint, and full of promise. *sigh* I was a happy artist.

high hope adventure 3

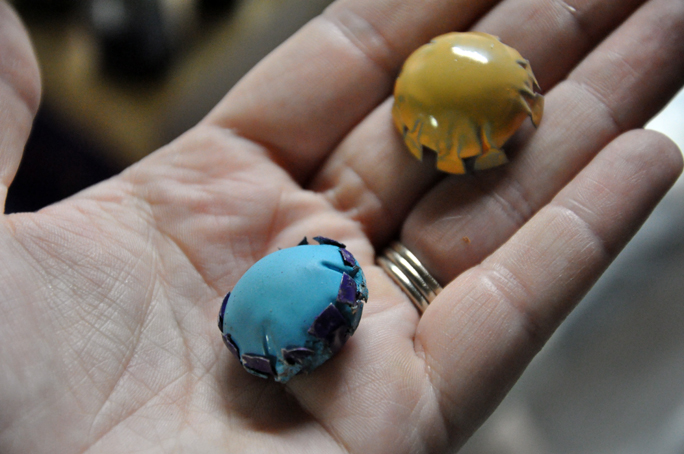
Fast forward to an hour into my Tuesday morning... cause ya know, before I even had my morning coffee, 2 seconds after I finished my run on the treadmill, sweaty and smelly, I tried to make those hollow painted bottle cap beads I had dreamed about all night long. I figured out really quickly that these were not going to be as cool as I thought and my slow slide down High Hopes Hill began. I felt determined though... could I ride the avalanche wave down the hill rather then tumble helplessly into a heap at the bottom? Maybe I was going about it all the wrong way? Maybe these caps would make for better bezels than beads? I could still paint them right? Paint the insides instead of the out!!

high hope adventure 4
high hope adventure 5

Insert wasting a few more hours here and start to picture me losing my cool as an avalanche surfer. Although the idea really sounds cool, and in theory it could be really cool... these things are crap. Where is Tim McCreight in your studio when you need him? I bet the King of Metalsmithing could create the lovely things clogging up me head.

high hope adventure 6

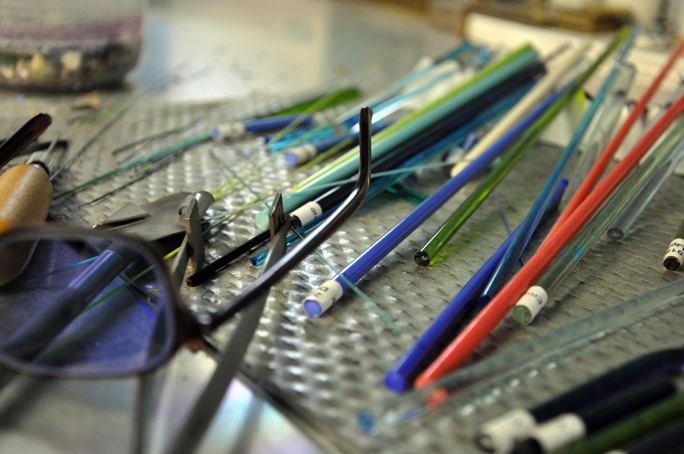
Determined to make the most of my studio time, I very very begrudgingly decided to flip on my kiln and light up my torch. What is the beady saying? When you are having a bad bead day, go back to basics. Right? Right. I was having a bad metalsmithing day, but that is just semantics. Whatever. A funny thing happened when I sat at my flame... my begrudged attitude faded out of site within minutes. I picked up my snow covered butt, brushed off the debris from my High Hopes Hill tumble, and with glass in my hand and even more new ideas in my mind, I set to climbing that hill again. This time a little bruised, a little wiser, but none the worse for the wear.

Friday, January 22, 2010

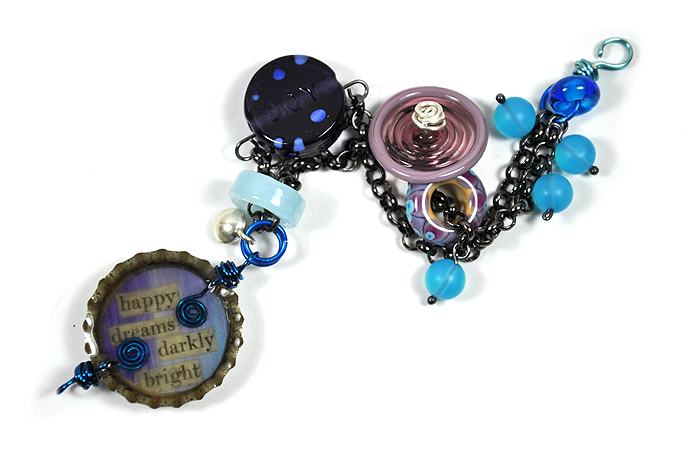
happy dreams darkly bright

darkly bright bracelet 1
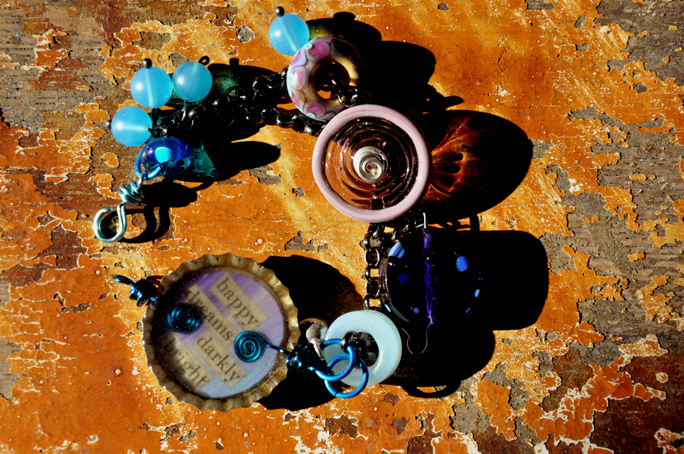
I have been experimenting again.(imagine me ringing my hands together and laughing like a mad man when you read that last line) My Wordless Wednesday post showed a little sneak peek photo of this new resin bottle cap design. Did you see it? LOL, not likely. It seems my resin has turned and gone all cloudy and yellow. Oh well, it was old. I had hoped that it would clear when it hardened, but alas, it is still a wee bit cloudy. Unlike this photo huh? LOL. We had a rare afternoon of sun yesterday that was begging to be photographed.

I am kinda excited about these new bottle caps. You might remember these caps using up lots of wirey scraps and made into pendants. I have been thinking for a while now that I wanted to find a way to set some of my mixed media paintings into small bezels, set with resin, and made into cool components. As I was making these though, I couldn't quite get the look I was going for with the tiny paintings/drawings, so I let my mind wander and pulled out that tattered copy of Shakespeare sonnets I have been using for my latest series of paintings. I opened to a page and picked a word. Suddenly, all sorts of words were jumping out at me.

There are many times when I see "inspirational" things with words or phrases and I wonder what *I* would say given the opportunity. Most of the time I can't think of a thing that hasn't already been said. The other day was different. The sentiments just seemed to roll out. I love this phrase that jumped out to me "happy dreams darkly bright". It isn't anything Shakespeare said, these were words from different sentences on different pages. I like that... I really like that.

The other phrases that are in the few caps I made are "loved clearly", "dream that it may be", "treasure beauty in love", and "nimble tears for sweet ". Yeah, for some reason, "love" comes up a lot in a book of sonnets... go figure. LOL.

Anyway, fresh resin is on its way to my studio. I plan to make more of these (I gotta lotta caps in my studio!) I would love to hear your thoughts though. Should I be making these into funky mixed media jewelry pieces for y'all or do you want the components to play with yourselves in your own jewelry designs? If I make them for you to use, do ya like one loop to connect to (like a pendant) or two (like in this bracelet)? An inquiring mind wants to know.

darkly bright 2

Friday, October 09, 2009

To Each Their Own

At this very moment, I am sitting in my living room, there is a fire roaring in the woodburner, the kids are outside together playing nicely, and yeehaw, my laptop is working again!! Do you hear the choir of angels signing and feel that sense of everything being right the world? LOL, no? Me neither... but it is a good day.

I have so much to tell you all about! I feel like my blog is suddenly an old friend I haven't seen in ages and I need to catch up with. There is today's topic, stuff around the house, news about the book, new jewelry I have been working on, and hmmm... what else? Oh, we have the Fall Walk this weekend, and the boys won their first football game in three years last weekend!! Hopefully I can get to everything over the next few days. Don't let me forget anything.

Today's post is the one I have been most excited to share. I was working on it the afternoon that my computer's ac adapter died. It left me with half my photos on my laptop and the other half trapped on my camera memory. I got to work on my very first round robin!! What is a round robin you ask? In this case, it is a jewelry exchange between a group of friends that has each lady working on each piece. The result is one of a kind keepsakes that have been created with wonderful energy and enthusiasm. They are truly special things.

A few weeks back, the lovely Lorelei had a random drawing for participants to be in a round robin. Now, I wasn't picked for it, so I sent Lorelei an email telling her to please rig the results next time so that I get to be involved. LOL. She responded with an invitation to participate in a separate exchange. Of course I wanted to take part!! The little birdies tweet tweeting together on this project are wonderful. There is Lorelei Eurto (d'uh, I told you it was her idea), Mary Jane Dodd, Barbe Saint John, and little ole me.
We started by each creating a necklace "start"... a few inches of a little sumthin' sumthin' to fire the imaginations of the next person in line. You can see the start of my necklace HERE on Lorelei's blog. Everyone mailed their starts to Lorelei, and she added to each. From there, she sent all the necklaces to me... and I added to each.
This is what I recieved from Lorelei:

lorelei_before

And here is what it looked like when it left my studio:

lorelei_after

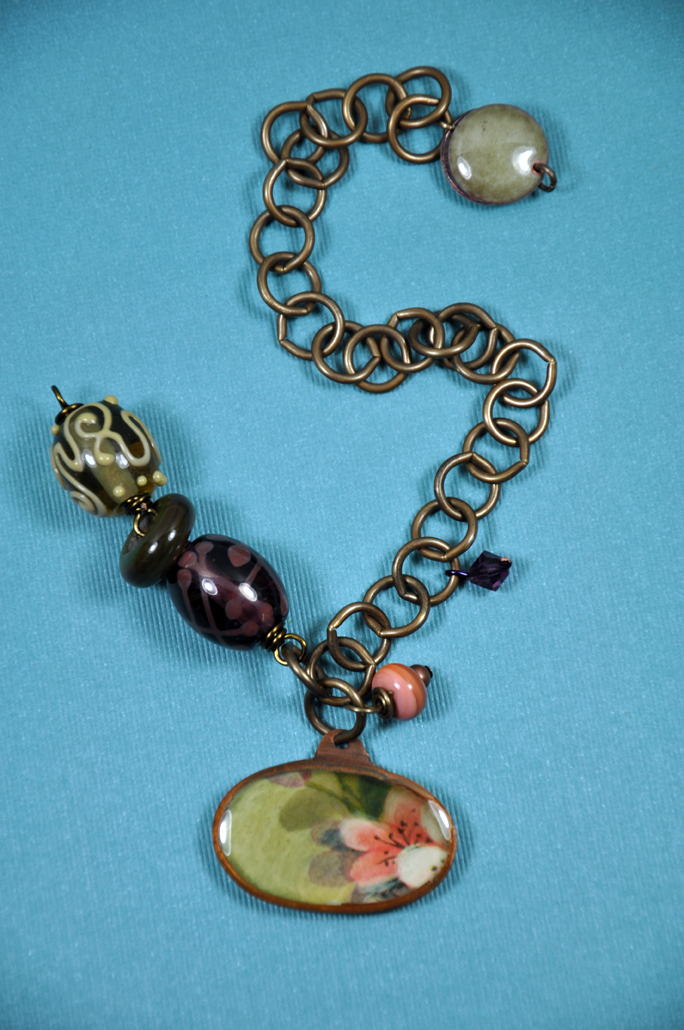
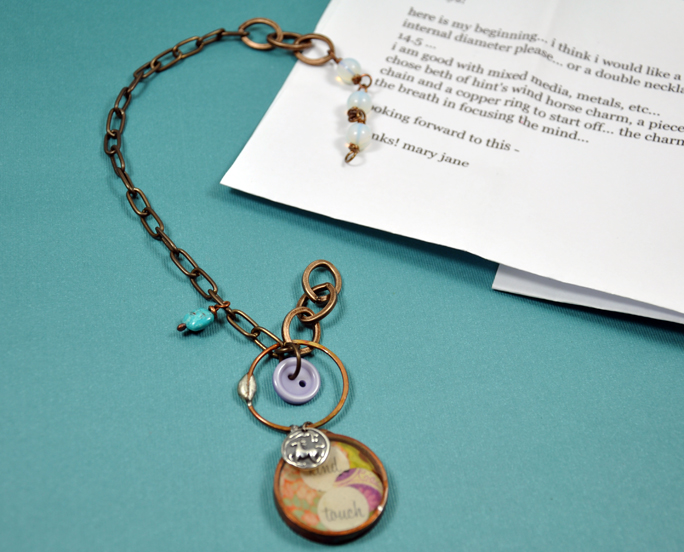
I added a pretty pair of egg shaped lampwork beads on vintaj brass colored wire from Parawire. I think the beads (one transparent purple, one toupe-ish) pick up the subtle purples in that darling pendant she started with. I really held back. I had to remind myself that there are two more ladies that need to add to this and I have to leave them something to work with.

This is what I started with for Mary Jane's necklace:

maryjane_before

And here it is after:

maryjane_after

For this one I added a simple rustic ring of glass for an accent to the clasp. I used a sterling silver link that mixes up the metals in this but pulls out silver in that tiny HINT charm in the pendant. I also put a tiny disc on the back side of the button that Lorelei added.

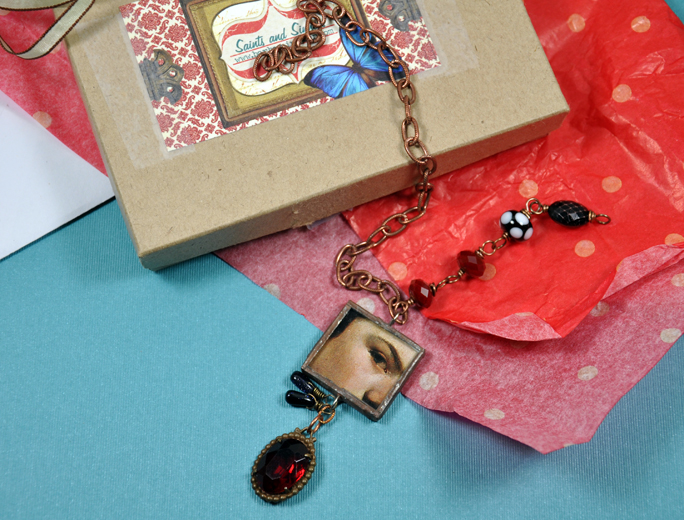
This is the piece from Barbe:

barbe_before

And here is how I sent it out:

barbe_after

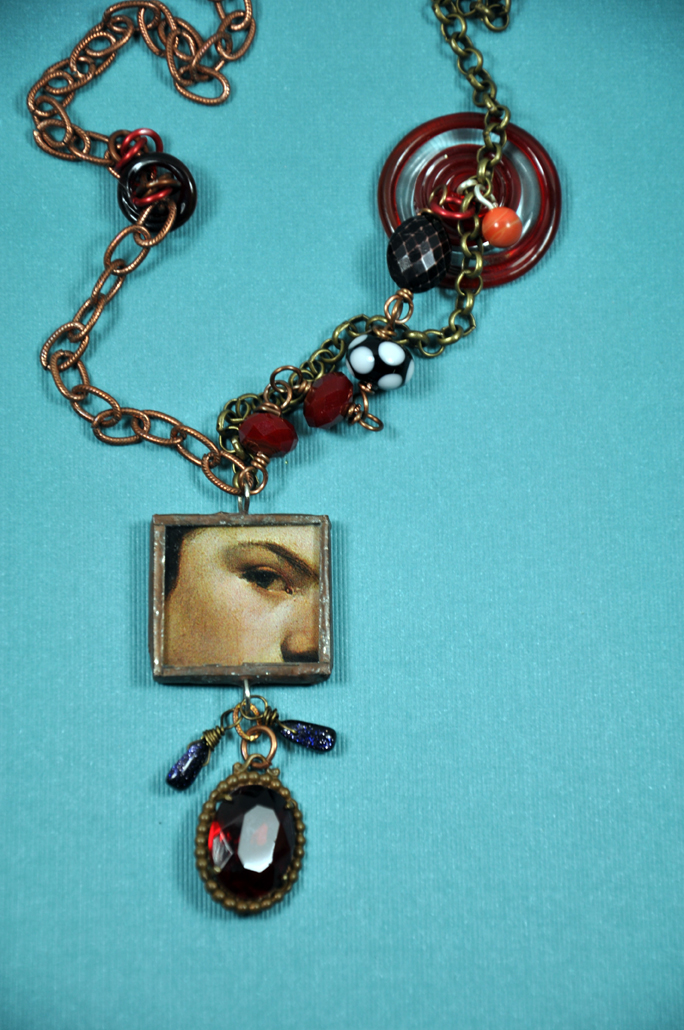
I totally think Barbe can pull off the big lampwork disc I added to the beaded side of this necklace. Her handmade pendant totally followed me all around the room. It had her eye on me making sure I did a good job. LOL. On the opposite side of the chain, I used some red jump rings to trap a small red glass ring. I think it is super funky and super fabulous!!

I can not wait to see my necklace when it comes back to me in a few weeks. I sent all of these off to Mary Jane the other day, once she addes to things, they will travel on to Barbe. I have begged and pleaded via email to get someone to add a pendant to mine!! LOL, I am shameless. I can't wait to see what they pick for me. This was such a fun and inspiring project and I really want to do it again!!

Who's game?

Thursday, September 10, 2009

An Interesting Experiment

experimental 1
This past Spring when I was in Loveland doing the shoot for my book, I heard the book Ancient Modern by Ronna Sarvas Weltman mentioned several times. It was mostly things like "what color background did we use on Ancient Modern?" or "it is the same size spread as Ancient Modern." When I was in Barnes & Noble the other day, I picked up a copy and had to take a look.

I love Ronna's use of color, I love her chunky style of jewelry, and I love the textures that everything has. I let things stew for a bit and started to wonder how glass and polymer might look together. I stewed on the thoughts so long that I couldn't get it out of my head. It started keeping me awake at night, lol. SO, with my first full day of freedom, I set out to the local craft store and bought me some supplies. I already had most of the suggested tools on hand from working with PMC. I just needed the pasta machine for working the clay, the clay itself, and I picked up a bead roller too.

The photo above is my first ever piece using polymer clay! I literally spent HOURS playing with the stuff. It really is interesting. I can't decided yet if I like it or if I wasted a lot of money, lol. The glass beads I used were just some beads I had laying around. So, the plan for today is to make glass beads this morning and experiment with polymer more this afternoon. I had another sleepless night of imagining the kind of glass beads I would rather see in this design, I am working on those first so maybe tomorrow I will be able to string some up a little sumptin sumptin. That is the trouble with being a glass artist and not necessarily a beader... I don't have a huge stash from which to work, I have to have the idea for the bead I want, make the bead, wait for it to anneal, clean it and then make the piece of jewelry. *sigh* sometimes I wish I had a stash of beads.

One thing I will say, for those that are thinking about trying to play with polymer. For me, I don't work well when learning with a blank slate, I need to have a project to try. And I think that is why I was working for HOURS on things. I was too scattered and didn't know what to do. So, this is the kind of situation where I say, copy a tutorial to the letter. Learn the technique. Keep that project for yourself. And then take off with your own ideas from there. That's what I am going to do.

experimental worn

Wednesday, August 26, 2009

Wooly Blend

wooly blend

In the midst of another day playing my role as referee to my wild children, I was able to hide out in the freshly cleaned studio for just a bit. While I was working on the last of the Lickety Split Orders last week, I made myself a few beads too. I didn't have anything specific in mind for them. I was just playing around... passing the time... trying not to go nuts making 30 discs in a row. I made a few hollows in my favorite shades of blue.

When I set everything down on my desk, I just started pulling things from here and there trying to make it work. The colors are a classic KABs combo... ink purple, turquoise, lime and periwinkle. OH, I almost forgot... remember when I shared photos of my felted bead experiment? As I was surfing my favorite blogs and found that the felting guru, Betz White, was offering up mixed bags of felted balls. I picked some up. Why you might ask, when I obviously could make them myself... her colors are great! and I wanted to see some "real" felt balls in action to know if I was doing things "right". Now I know I am, and I have a great variety to work with.

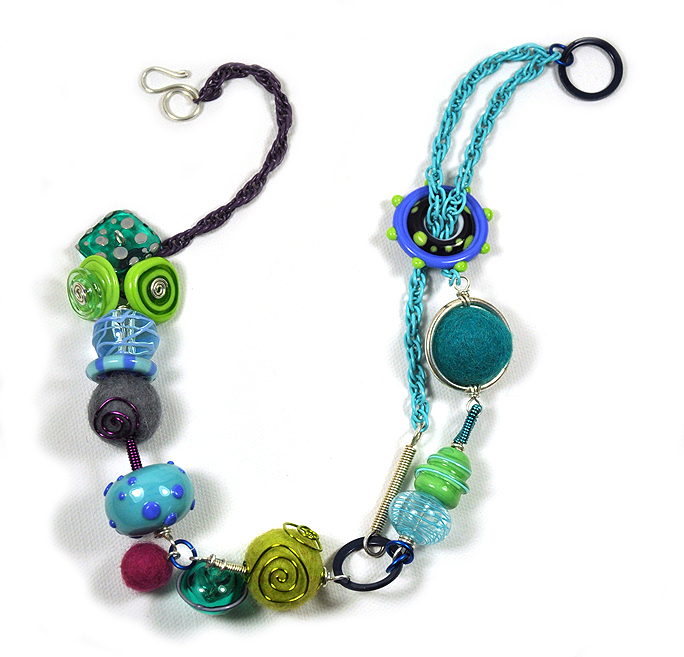
Anywho... I just started pulling things together. Some scrap wire from here, some beads from there... and in no time... TADA... "Wooly Blend" was made. It has been quite literally WEEKS since I have made anything and I am not really sure what to think. I like the mixed up jumblingness of this piece and the mix of textures, but at the same time, I think something might be missing.

wooly blend worn

Excuse the puffy eyes and overall tire expression I am sporting in this pic. I told ya the kids are wearing on me. This was the best I could do, LOL! I would love some feedback on this. (the jewelry, not my puffy eyes, lol) Should I simplify things a bit? Is there too much going on? Is it fine the way it is? Comments people, leave them.

Tuesday, August 11, 2009

... all on a summer's day ...

(aka... boredom busting project #2)

picnic basket project 1

Dear Mr. Warren Kimble,

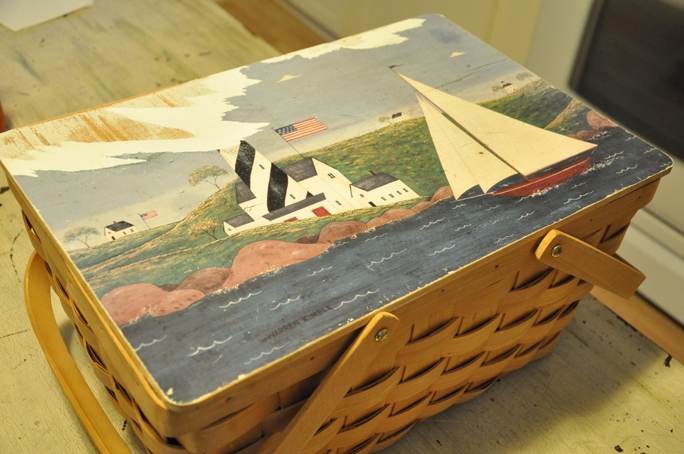
Several years ago, my Mom gifted me a lovely picnic basket with one of your folk art styled images on the lid. It is the one with a striped light house and sailboat on it. I have loved it over the years, it goes with our family on all our outings to the park. Would you believe, I even have the set of matching dishes and cups too? Though, some of the cups have cracked and some of the plates were used to make some resin art jewelry on. We still use, what we have left of them, when we eat out on the deck.

Anyway, I am babbling. I am writing this post today as an apology of sorts. From one artist to another, I am sure you can understand that not all people like the same thing. And while I can appreciate your unique New England style... light houses and sailboats, they just aren't "me". The other day, I decided to change up your picnic basket lid.

picnic basket project 2

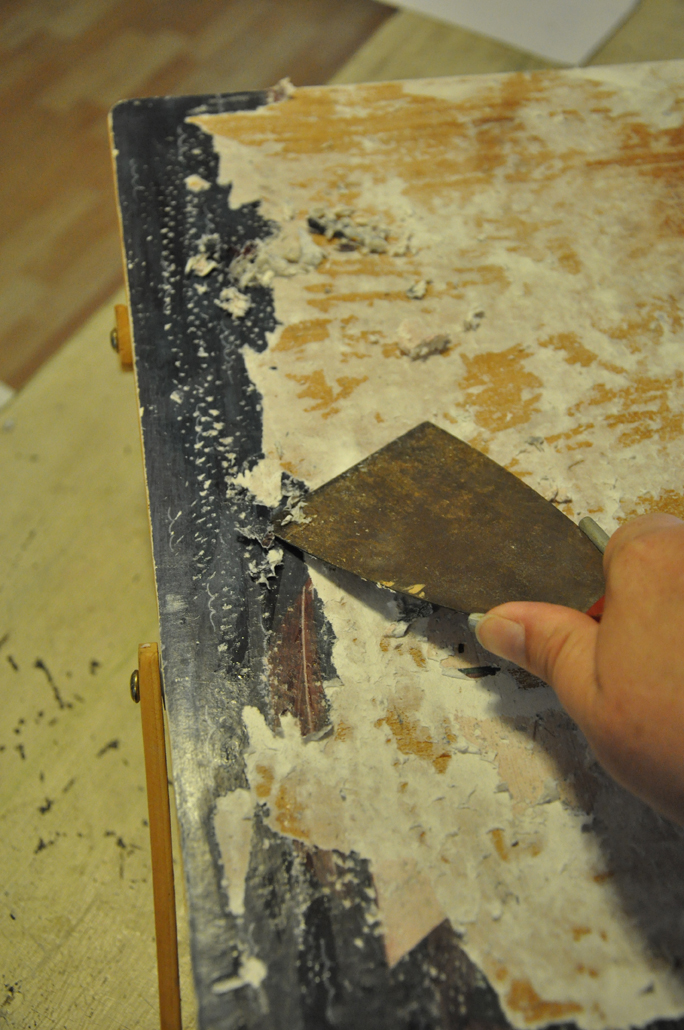
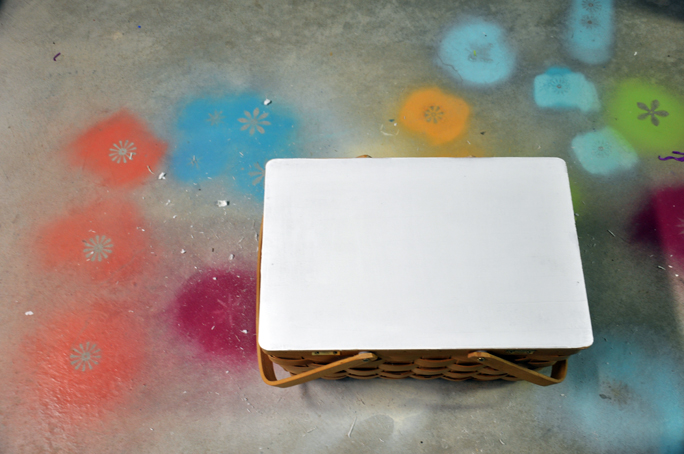
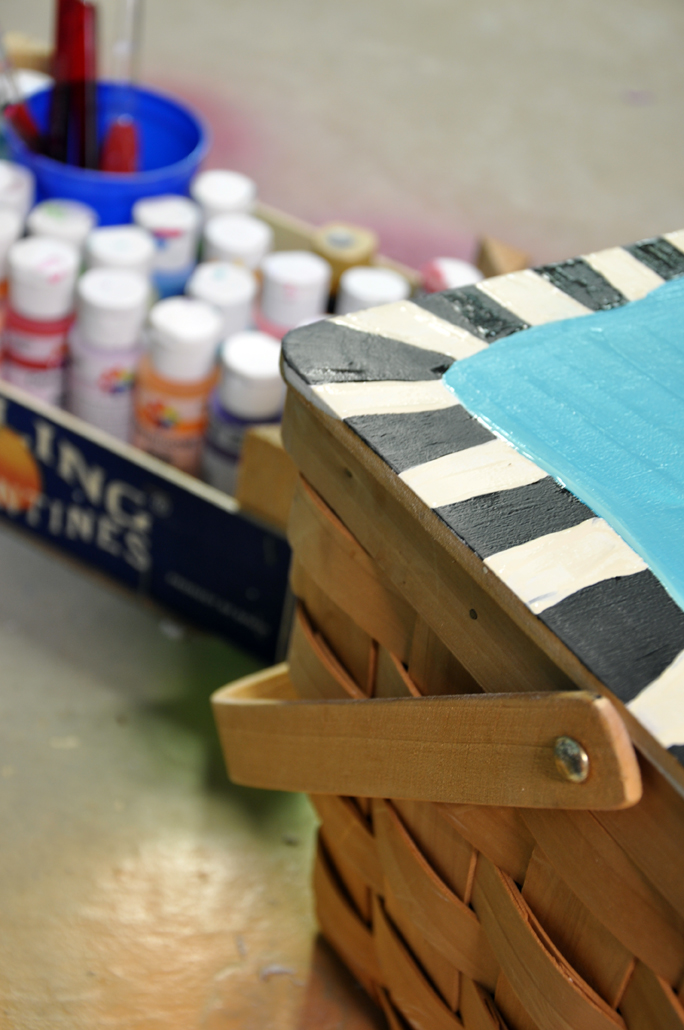
At first, I tried just peeling the paper image off, but props to your manufacturer, Mr. Kimble... it was really stuck down! I tried wallpaper remover, and a scraper, but finally, just had to pick and pick and pick at it with my nails. And then I sanded it and put down a layer of primer. The project ended up becoming so messy that I couldn't keep working at my small kitchen table, I had to set to work in my studio floor.

picnic basket project 4

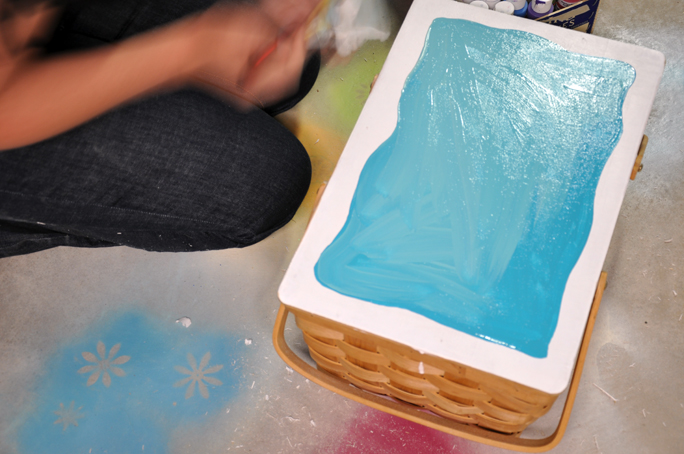
But what to do with that fresh, blank slate of a lid? I knew it needed some blue, it is my favorite color these days. And although I liked the rustic denim blue that you used in your seascape, I am more of a teal-blue gal myself. Mixed with a little cream and some seafoam green too. All blended together... *sigh*... is it such a wonderful color.

picnic basket project 5

picnic basket project 7

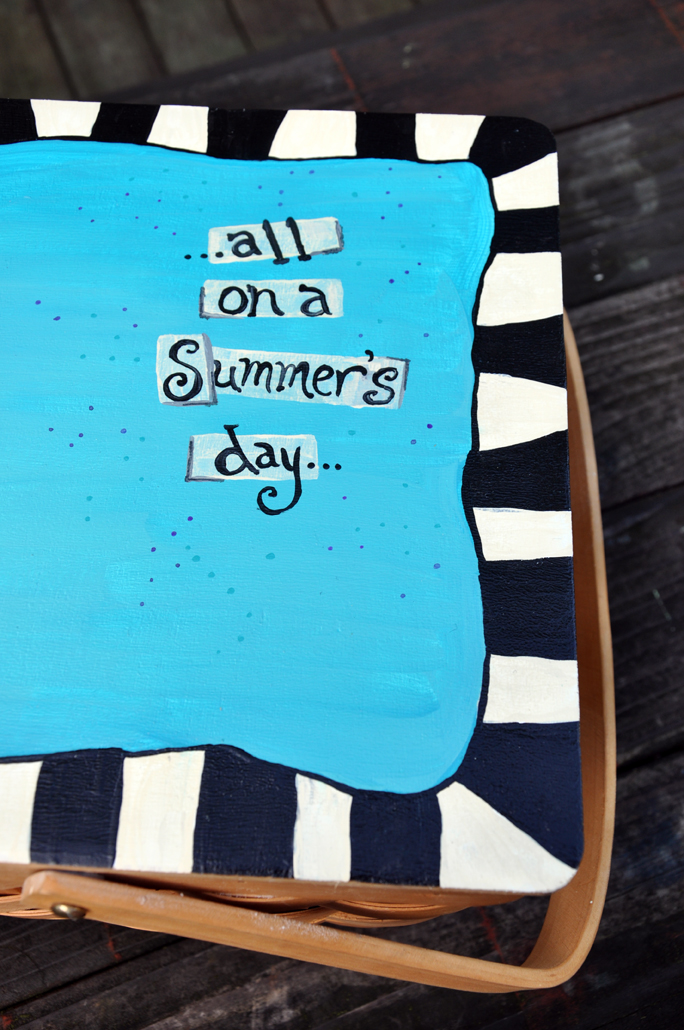
I doubt that you are familiar with my work, but I have been know to paint a project or two from time to time. And I love black and white stripes/checker boards. Hmmm, I wonder if that might be why my Mom bought me your picnic basket in the first place? The light house what striped! Surely, that must be why. Checkerboards are just plain fun, don't you think? They make me think of mid century kitchen floors and poodle skirts... and oddly, at the same time, I think of imaginary places too. Like... Alice In Wonderland.

I love the poem in Alice In Wonderland (the one with real people that aired on TV a while back with all those well known actors in it that I can't name at the moment... you know the one) where Jack is on trial for stealing the Queen's tarts.

It goes a little something like:

The Queen Of Hearts, she made some tarts, all on a summer's day...
The Knave of Hearts, he stole those tarts, and ate them right away...


As I finished up the edging on my basket, I knew I needed one of those lines on this lid.

picnic basket project 8

picnic basket project 9

So, no hard feelings right? It really was a nice basket before, but now... NOW.. it ROCKS! And it is so "me".

Sincerely,
Kerry

Thursday, August 06, 2009

Browsing Over Morning Coffee

101 wire earrings
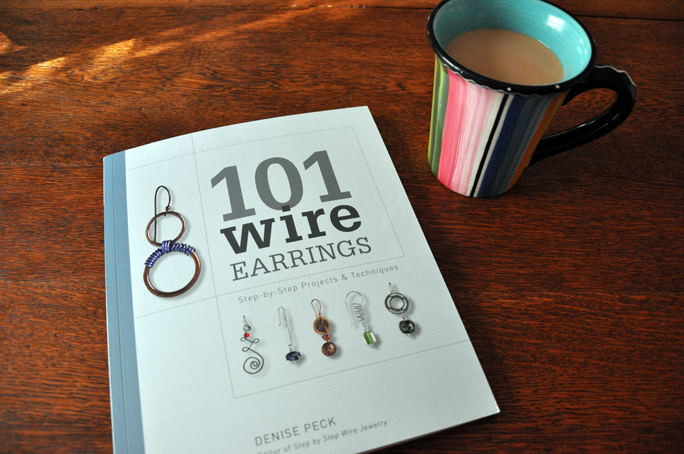
Yesterday was such a nutty day. Just plain hectic and hectic doesn't sit well with me. I am happier in a lazy day. Well, lazy sometimes... I am really really happy in a day that flies by while doing something I love. But then, aren't we all. Thankfully, today isn't an over scheduled day like yesterday. I do have a few must-get-done things, but other then that, the day is open. I started it at the dining room table, with coffee in my favorite mug, and a fresh copy of 101 Wire Earrings.

It was released to bookstore shelves on Aug 1st and I have been stalking the Barnes & Noble website waiting for it to read "In Stock" for my zip code. Why didn't I just pre-order it? There is just something about walking into an honest to goodness bookstore and seeing it there on the shelf with all the other books. You might remember my reaction this time last year when I discovered Wire Style by accident. This time, I had Lauren and Andrew with me to help find it. Lucky for us, there was one still in stock.

As an aside, I must say, strange things are happening at my local B&N stores. I went to the one in my town and one just one town over (Rochester has several of them) and the "craft" section where the jewelry books are held has gotten very. very. small. Where I used to see 4-5 copies of a book, I am only seeing 1-2. And where there used to be 6 shelves for jewelry, there are now only 3. Anyone else seeing this? Is it just a sign of the times? Hmmmm...

Anyway, I am babbling. What I really wanted to talk about today is the earring deliciousness that is ooozing out of this book. Over my morning coffee, I went page by page checking out all 101 earrings. Denise has really out done herself, the inspiration in here is FANTASTIC. If I am totally honest, although I am a contributor (seven designs in the book are mine), I really struggle with making earrings. There have actually been shows where I didn't make a single pair to sell. I like earrings to be unique and sometimes unique earrings ideas can be hard to come by. I think this book is exactly what everyone needs to keep the 'unique' ideas flowing. There are just so many possibilities that can come from these examples. You can make one of the pairs in the book... totally love them... and then think "what if I do this..." or "what if I do that...". Now do that for every pair in the book and you are going to have hundreds of designs to make.

*sigh* earrings

Actually, I have an earring challenge coming up. Next week is my friend Lindsey's birthday. We always exchange handmade gifts (remember her birthday is my half birthday and thus, vice versa) and this year, she requested some handmade earrings to add to her collection. With this book now in my hands to spur on new ideas... I think I can handle that.

Friday, May 29, 2009

That Is Better

simple bloom

Thanks for all the well wished and commiserating yesterday. Sometimes ya just gotta complain, right? LOL. I am feeling better today... not 100%, but I am getting there. A little time in the studio helped a ton. I have been having fun spray painting some of the rusty vintage enameled pieces I have been collecting. I have been doing the spray painting right on the studio floor! I get these colorful little flowers here and there. How cool is that?

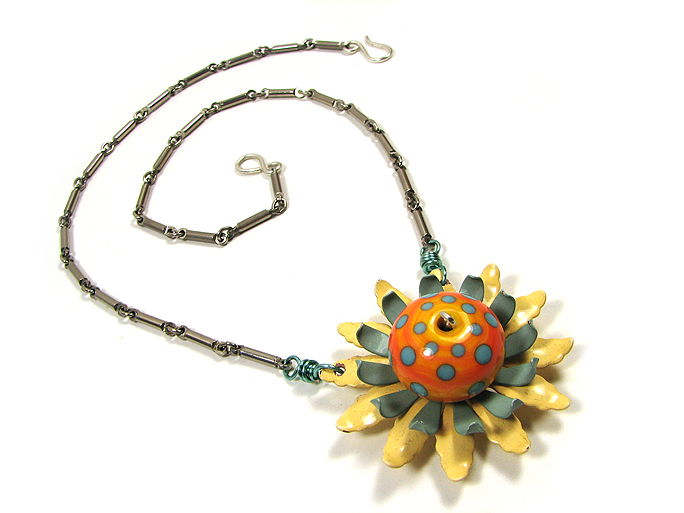
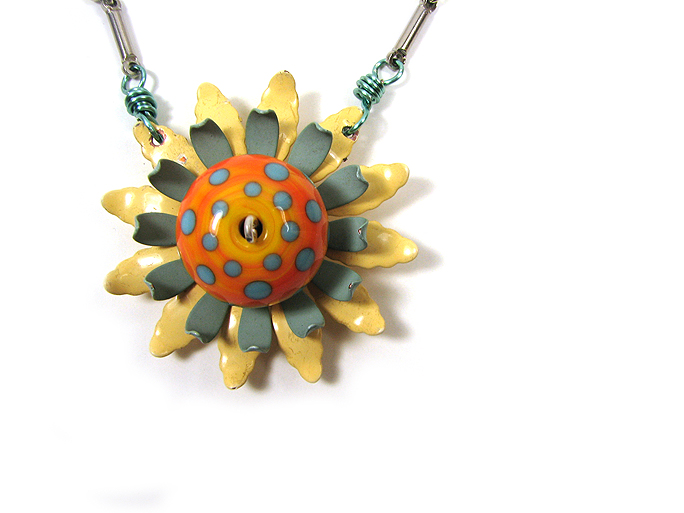
This piece is another from "Re-Inspired Junk Collection", this piece called "simple bloom". Yes, with lower cases, because it is simple, not stuffy, it doesn't want capitals. I love that bright coral orange hollow with it's little turquoise dots. *sigh* and it is all hanging from some recycled chain I took out of a necklace my Mom brought me from an estate sale. This is the perfect wear with anything summer necklace. It looks great with almost every color! (all but red, I think)

There are more where this one came from, and I will be sharing those next week. OH! I came up with a bracelet design using these too!! I can't wait to share those. Just need to wait for the spray paint to dry.

simple bloom close up

Wednesday, May 13, 2009

ReFunked

ReFunked


Don't worry, I don't think all the pieces will have "Re" in the title, LOL! But as long as I can come up with them they will. I introduce to you... "ReFunked". And my stars do I need to be careful when I type that. Wouldn't want to put a c in place of that n. I would need to put vulgarity warning on the old blog here. ;)

WOW! Truly, that is how I am feeling about the comments yesterday. WOW! You all are such a huge support. Thanks for your understanding and wonderful words of praise. LOL, you know, you are probably half the reason I get so insecure. Such pressure to keep delivering cool things! How can I keep up to the hype? I don't know how I'll do it, but I'll keep trying.

I think Deb said what I was feeling better then I could in her comment yesterday. She said "Until recently I worked with artists (some of an international calibre) for a number of years. One thing I learned is that, artists often hold things close - it's somewhat like nurturing a baby for 9 months....everything has to be ready in order proceed. That also goes for how you feel about it!" YES! That is how I was feeling... I didn't want to share... I didn't know if it was ready. (and those other things I mentioned too)

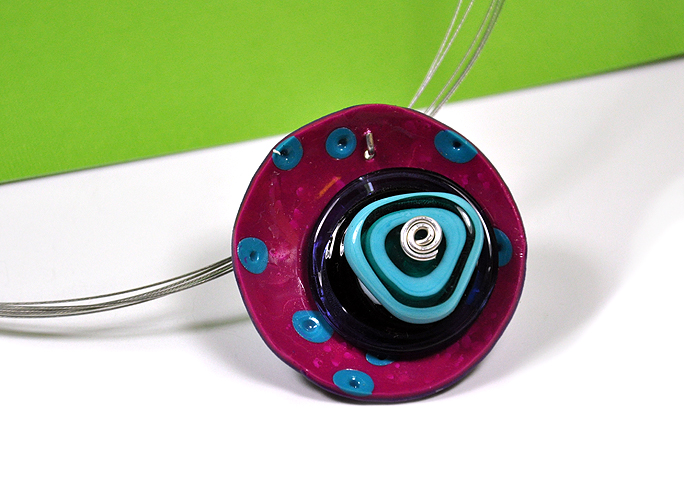
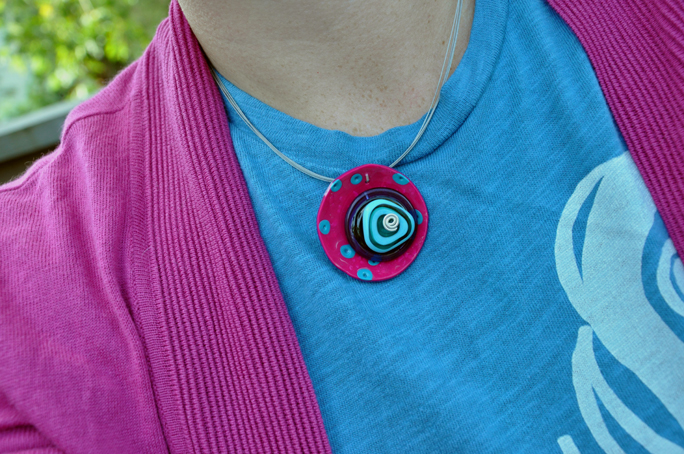
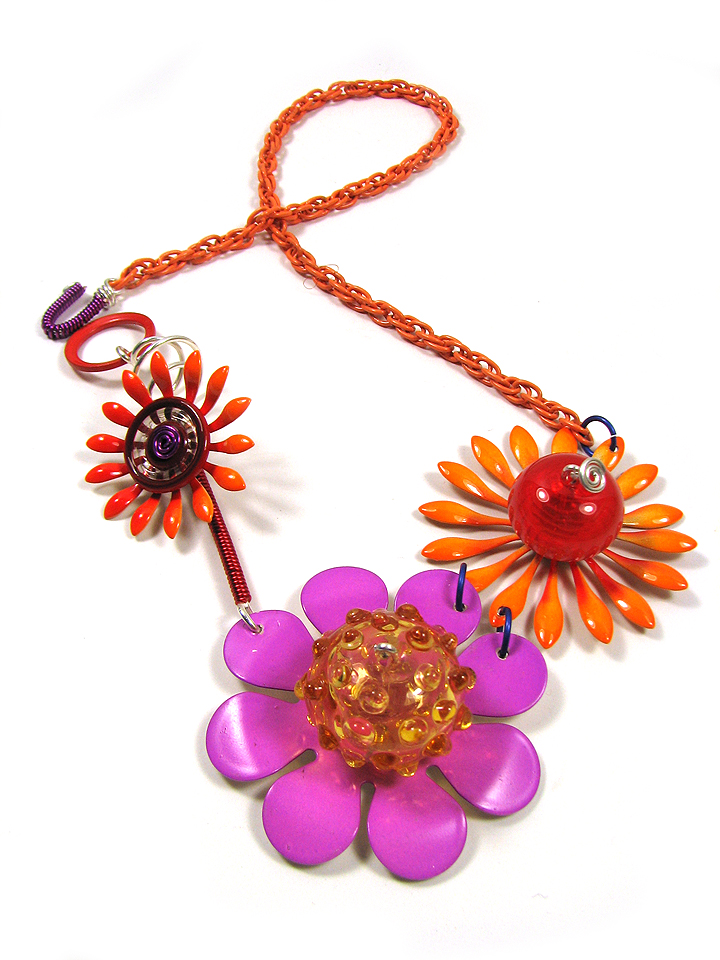
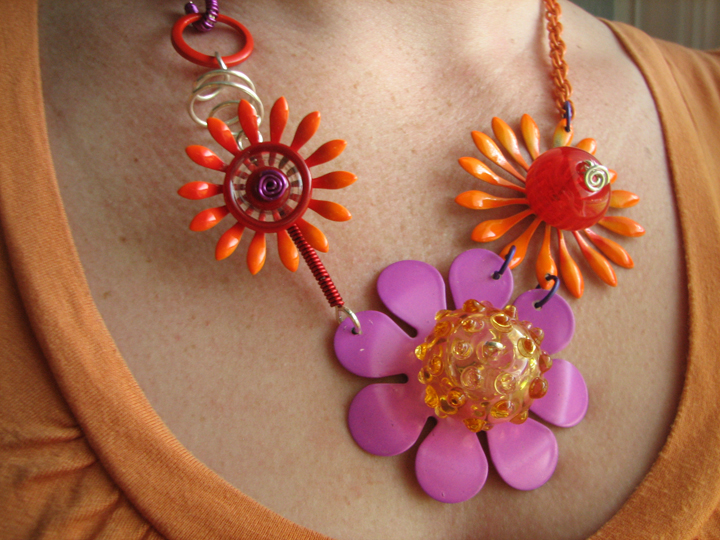
Enough about that though. More about "Refunked". I LOVE these colors!! So bright... so big... same thing I was saying about "Respired" yesterday. I think this would look good with a white top, pink top, orange top, black top. There are just so many options. I love the orange and red with the pops of pink and little touches of lavender. This piece has three beads (two hollows and simple disc). Man , I am getting anxious for more supplies to come to explore these designs more. I hope they get here soon!!

ReFunk Worn

Tuesday, May 12, 2009

Re-Inspired Junk Collection

Respired Before

Okay, to be perfectly honest, I am feeling very vulnerable at the moment. I have been working behind the scenes on new jewelry designs for this summer. The process has been awesome. It makes me all giddy and excited. At the same time though, I am very unsure. I am worrying, holding them close, and not wanting to share. I have six new pieces sitting on me desk and I can't decided it they are genius or junk. I don't think you all could stand another fluffy post about nonsense on this blog so it is time to share what I have been working on...

Respired


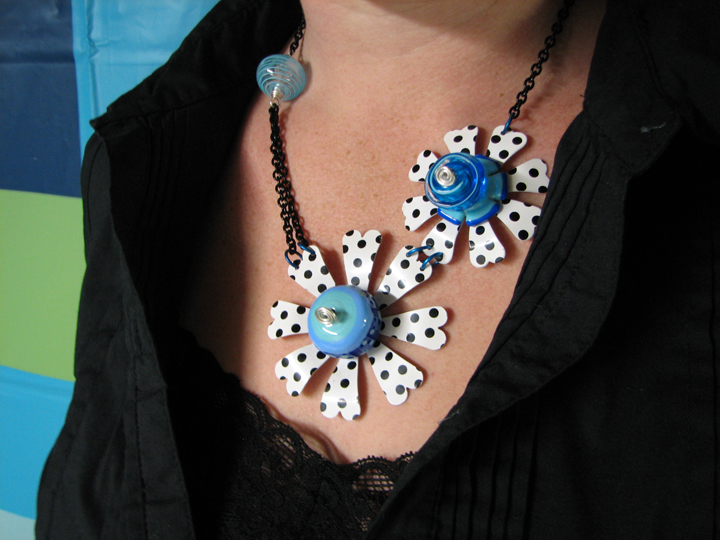
"Respired" is the first piece in the "Re-Inspired Junk Collection". You had to know that if I was going to jump on the repurposed jewelry band wagon that I would find a way to do it with wild color. Yes... repurposed jewelry. The photo at the top is of an enameled metal brooch I bought while out thrifting with Lorelei last weekend. Very sixties/seventies. It is BIG and BOLD, measuring more then 3inches across. I totally busted it apart. I used wire to bring the pieces together in a new way, added big lampwork hollows, then strung them up with vintage enameled chain. I love using enameled pieces. Essentially, enamel is glass... so I am still using glass in a creative new/old way.

Why am I feeling all insecure? Several reasons. First, I can't decide if I love it or hate it. Is it too much? I have worn it a few times, outside the house, and it is light as a feather, you hardly know you have it on. Yet, everyone else knows you are wearing it and you gotta be prepared to have your chest stared at all day. Second reason, I really think I am on to something here. And I am very worried that the minute I show this light bulbs will turn on over peoples' heads and I am going to see tons of flower pins turned jewelry components show up every where. I am feeling very protective of it, at the same time, I can't not show it. How will I get feedback about reason #1 if I don't?

Respired Worn

So far the reviews have been great. I previewed this photo on Facebook last week to lots of love. I am really loving an orange and hot pink design setting on my desk that I will share tomorrow. Now it is time to hear from you... leave me some feedback. Have I gone off the jewelry deep end? LOL.

Thursday, April 30, 2009

Let's Take A Ride...

What kind of ride? A Ferris Wheel Ride!

Ferris Wheel Ride

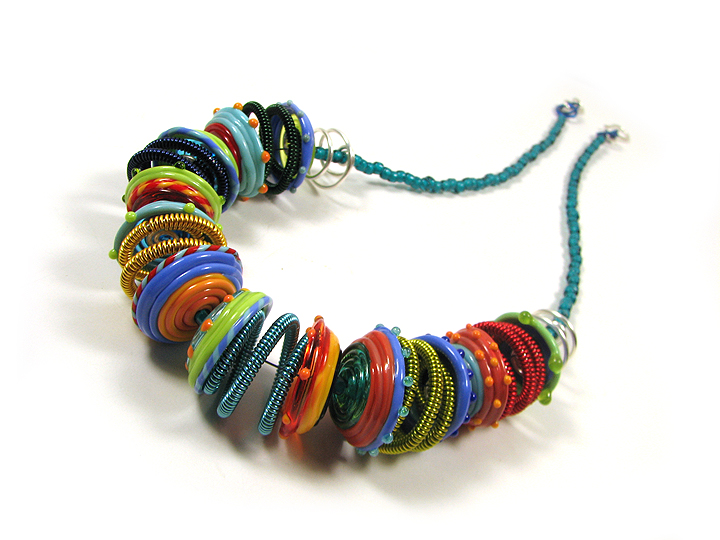
Oh how I love what-if-I-do-that ideas! On Sunday when I was working on the custom necklace I showed earlier this week, I was building up layers to make the cool hollows when I though... what if I do just that? See, I had the idea in my head that I would be creating those big coils of wire... so I wondered, what if I only made half a hollow, and "capped" the big coils?

What is half a hollow, you ask? The way I build a hollow is from a tutorial in one of Corina Tettinger's booklets by Jill Symons. Essentially, I build up two discs on a mandrel and slowly add rings of glass until they touch somewhere in the middle. So I was thinking... what if I built up a disc and it didn't meet something in the middle? What if it was just a sorta cupped disc?

Ferris Wheel Ride - Alternate View

That got my mind really whirling. Then, "what if I make them all different colors" started running in my head. I worked on these beads Tuesday and just went crazy. I pulled stringers and twisties... I grabbed one of every color for a whole rainbow of rods on my desk. It was FANTASTIC!! It was exactly the creative outlet I needed after a wild week home with the kids.

ferris wheel ride worn

As I built the necklace and twirled the wire, the capped coils reminded me of Ferris Wheel Carts... Like These. (Only mine are way more colorful.) I am thrilled with how it turned out, though I think I want to made a few more and make the coils go a little farther around the neckline. When you hold it in your hards, it is so slinky, I love the way it moves.

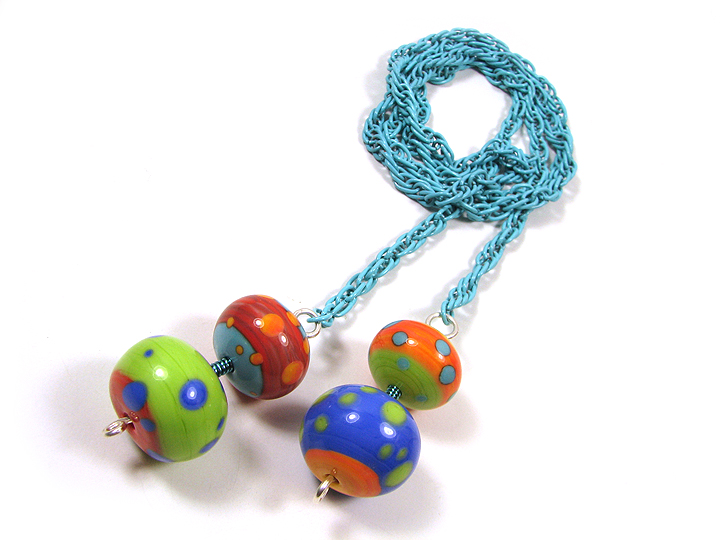
What I find awesome about the creative mood I am in right now is that ideas keep building on each other. As I was making this side winded discs, I thought... okay what if I make hollows now? So the idea kinda went ful circle. Hollows... lead to discs... lead back to hollows. I thought, what if I layer the colors into a wild colored hollow?!? You gotta be careful when using opaque color in hollow forms, it isn't as "stiff" as transparent glass and becomes much more soupy when molten, which leads to colapsing hollows. I was patient and things seemed to come together.

Funny Hollow Lariat

I want to experiment more with color combinations for these. I am so so with some and extrememly psyched about others. This is the "Funny Hollow" lariat! I know you all are going to be asking about that blue chain!! Well, I have been wanting to add even more color to my work. I knew colored chain was out there and I did a little research. Basically, there are three types of colored chain... plastic (YUCK!), anodized (like the colored wire I use), or enameled. This chain is the later. Enameled chain isn't made anymore so the only way to find it is in vintage form. I love it! Enamel is essentially powedered glass, so the colors I have found work beautifully with my work. I have several sketches with design ideas for this lovely new finding of mine. But we can't put my whole line of jewelry for the summer in a single post.

funny hollow lariat worn

Saturday, April 25, 2009

KABochons

kabachon mess making

Magical Mess-Making + Husband Holidays = KABochons!!!

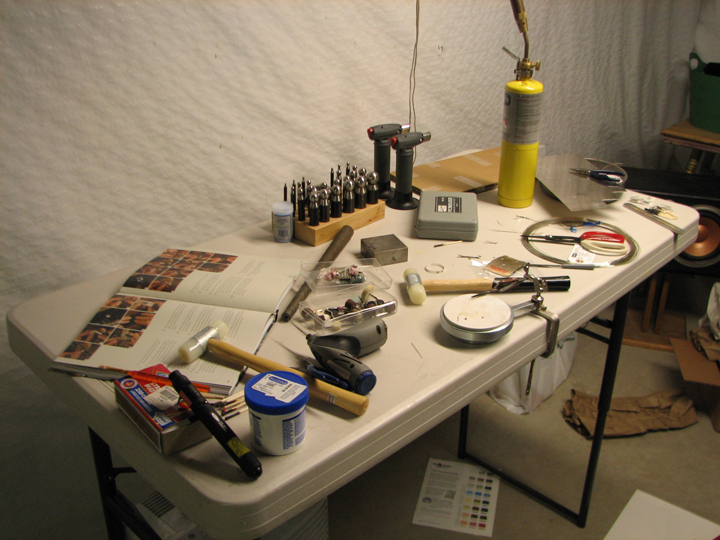
In a recent post on Watch Me Create about the books currently sitting next to my big comfy chair, I swore I would learn to bezel set, even if it killed me. I ordered all the materials more then a week ago and they finally made their way here in my house yesterday.

It was a nutty day yesterday... doctors' appointments, swim classes, hair cut appointment, baseball practice, and a sleep over! I was running like a crazy lady. Thankfully though, Ron, in his infinite wisdom, knowng how rough the week was on me, took the day off work to help me out. In the middle of the day, I squealed with joy at the UPS guy bringing me my bezel setting box of goodies. And Ron was happy to let me stow away in the studio for a couple hours. He even brought me food while I was working away!

I quickly ripped open the box (you can see the packaging all over the floor in the photo above), I went nuts rummaging through storage boxes to find missing supplies I knew I already had somewhere, and set to work.

What.A.Learning.Experience.

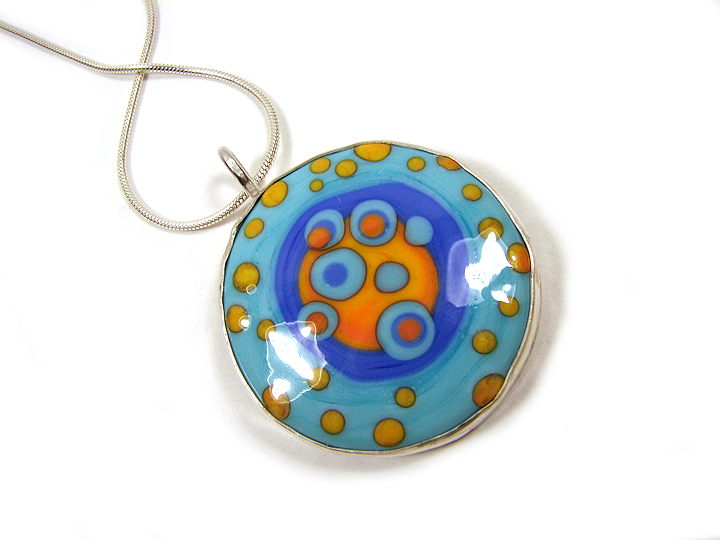
KABachon - Top View

Here is what I have learned so far:

1) Solder needs HEAT, so I am returning the crappy little "pencil" torch that I paid $41 for and I am looking for something hotter. Yesterday I ended up using my trusty hot head to solder, but that flame is big and bulky, and hard to control.

2) Bezel wire melts if you get it too hot with your hot head torch, lol. For those of you not familiar with bezel setting, basically you build a "cup" (bezel) for a bead/cabochon from metal. First I built the frame that wrapped all around my bead (from bezel wire), then I soldered that frame to a piece of sterling sheet metal...

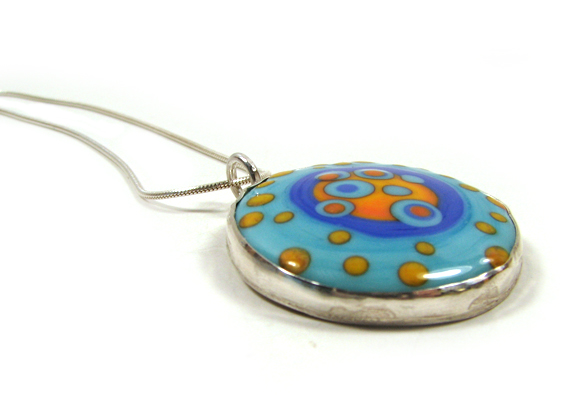
KABachons - Side View

3) I need better saw blades and dremels are good for more then just cleaning beads! After I soldered the bezel wire to the sheet metal, I needed to saw away the excess metal and file/shape/smooth/sand the edges around the outside edge of the bezel. I went though 8 jewelry saw blades before pulling out my dremel. HA!

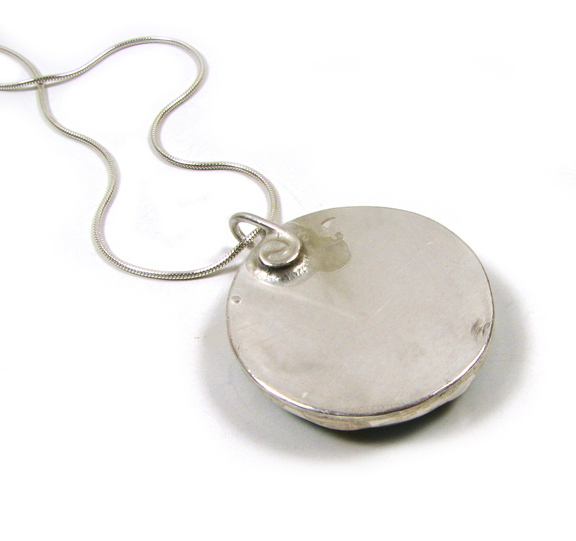
4) Use less solder. You can see in the "back view" of my new bezel pendant that there is way too much solder attaching the bail to the back of the sheet metal. Oh well, I am learning.

KABachons - Back View

I don't think these are ready to sell yet, I need to work on my technique... BUT they do make for a good "Random Act Of Kindness". I gifted a purple one of these to Marcia yesterday afternoon! Enjoy it Marcia!!

Oh, and before I go enjoy this G.O.R.G.E.O.U.S. weather we have in Rochester this weekend, I want to tell you all thank you so much for your comments on Thursday's post. It is a wonderful support to know I am not the only ragging lunatic of a Mom, lol. The kids head back to school on Tuesday... I am looking into summer camps... and I'll be alright. You are all appreciated so much... I hope you know that. Thank you.

Tuesday, March 24, 2009

Don't Make Me Stippel You

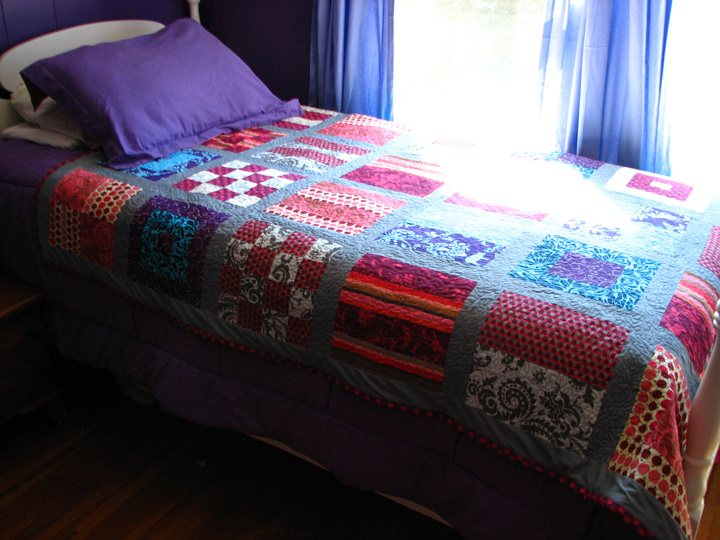
lauren's birthday quilt

It's DONE!! Lauren's birthday quilt, for Oh, Fransson Quilt Along, is DONE!! Yoo HOO!! And with time to spare (her birthday isn't until Monday). You can find a whole set of photos from the project HERE in my Flickr Gallery. I just ran up to her room and popped it on her bed while she was outside waiting for the bus. LOL, I like being sneaky. I will have to hide my blog from here until Monday. Shhh.... don't tell her. She thinks this is for me to keep warm in my studio with.

This was such a fun project. I have never machine quilted before. I have made plenty of quilt facings by machining pieces together, but I usually hand the quilt sandwich off to my Mom for hand quilting. I just don't have the patience for hand quilting. Lindsey was awesome, and lent me her sewing machine that has a free motion presser foot so I was able to quilt it all myself!!

I wasn't sure if I would "stitch the ditch" or "stippel". Eventually, stippeling won out. And Oh.My.Stars. is stippeling fun. It is basically a giant squiggle line. I started in the center and worked my way out to the corners. It took about 5 hours on Sunday to get all the stippeling done. I drove Ron nuts... I stippeled all the way through the Syracuse Orangeman's basketball game. LOL. I just couldn't stop!!

I think I am going to make a quilt for each kid's birthday this year. Next up will be Andrew's in July!!

Friday, March 20, 2009

2 Cameras

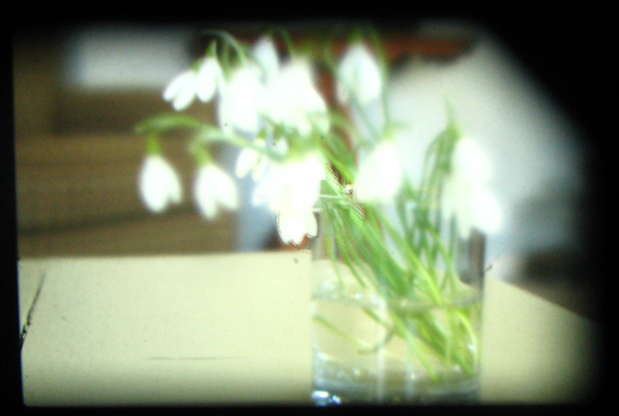
snowdrops1

I had a little bored-with-nothing-to-do-for-an-hour time yesterday. You know, it is the kind of time where it isn't enough time to justify starting a project, but it is more time then you need to do something else. I have been wanting to try this little photo experiment for a while. The light was just right, so here is what I did.


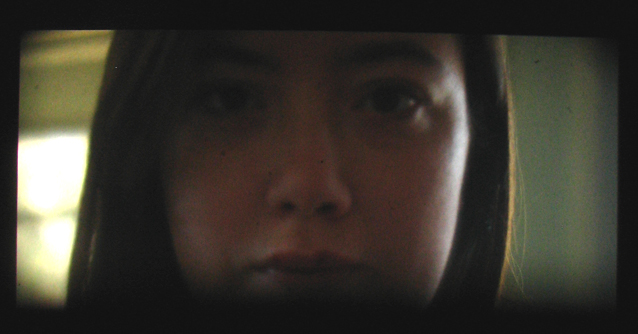
portrait2

There is an amazing art retreat at Squam Lake in New Hampshire. Someday I will make my way there. *sigh* Anyway, one day, weeks ago, as I lusted after all the classes I would love to take, I came across the class called Through The View Finder, taught by Andrea Jenkins. I found the idea of taking a photo through the viewfinder of another camera such a unique idea. I knew I would want to try it.


living room corner

I love the look of old timey vintage photos and this turned into a really fun experiment. I don't know if I did it quite right, but I am gonna keep trying... when I get another little window of nothing-to-do-time. And by the way... you thought it was hard to take a picture of yourself while holding the camera out in front of you... try balancing two cameras, lining up the windows just so, and then pressing the button without messing upthe line up. lol. It is dang hard to do!!

There are more photos on Flickr!